

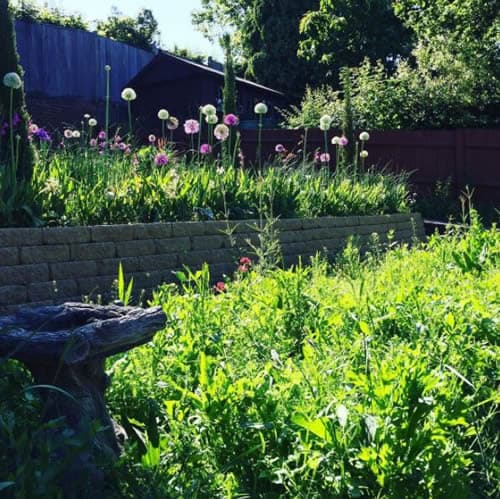
A steep hillside garden is often blessed with a lovely vista and, indeed, we can see the beautiful Surrey Hills from the top of ours. However, a ‘non-terraced’ hillside garden is hard to enjoy unless you’re six years old and relish repeatedly rolling it down it (covering yourself in sticky moss). Elderly visitors are nervous of leaving the path and even with a Flymo it’s an exhausting (if not dangerous) exercise when it comes to mowing the grass. When MrsGrow said “I want a nice seating area at the top of the garden” she probably didn’t envisage me building terraced walls and hard landscaping but if a job’s worth doing it’s worth doing well…
After a bit of research (and review reading) I decided to terrace the top of the garden using Marshalls Croft Stone Walling to build two retaining walls. The bricks are mortar free and stay in place because they are heavy (12.5kg) and each brick has a lip which overlaps the previous row beneath, preventing it from shifting forwards. Now I’ve never built a wall before and am certainly no builder which made MrsGrow rather nervous… but when I explained the cost benefits of doing it myself and conveyed my confidence she came around.
Marshalls Croft Stone Wall bricks have a recommended limit of 6 rows which is a total height of around 60cm. Of that 60cm, half of the lowest brick will need to be buried which leaves you with a maximum 50-55cm of wall height. You should factor that into your landscaping measurements for distance, you don’t want your wall to be too low or you’ll still have a slightly sloping terrace behind it. I simply used my eye, a tape measure, canes, a spirit level and a lot of string to place markers. In the gallery below you can see the process of preparation to level terraces behind temporary turf walls:
Garden Terracing Preparations:
-
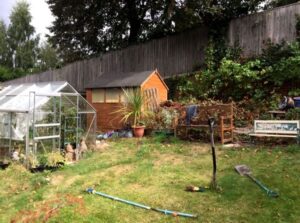
- 1. Top of my garden before I started.
-
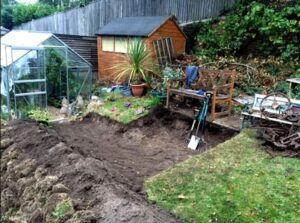
- 2. Dig a trench to see what you’re dealing with, there may be concrete down there
-

- 3. Or… there may be parts of an Austin Healy and a Royal Enfield 1929 motorcycle to remove!
-
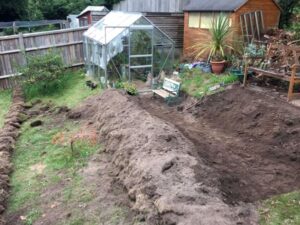
- 4. Remove the turf with a spade and fork and turn it upside down to die.
-
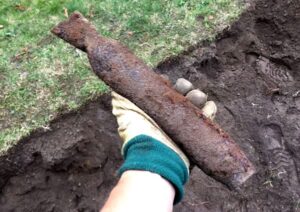
- 5. Panic if you think you found a WW2 incendiary bomb
-
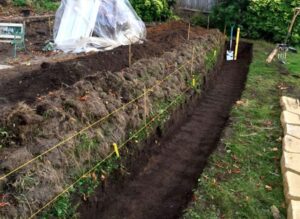
- 6. Pile the lifted turf behind your planned wall position, dig a slightly CURVED trench 30 cms wide and level it. A curved wall wil be stronger, important for a no mortar wall
Once you’re done with the digging and levelling of terraces (and it’s a big job which took me a good few weekends to prepare) it’s time to order the bricks. I ordered mine from Wickes, they seemed to be the cheapest and most reliable source in the South East at £360 for 90 (Spring 2017 price). I ordered 3 pallet loads, so yes my walls have cost £1080 in materials alone plus sub base mot 2 to line the trenches and shingle, so call it £1150. The gallery below walks you through some of the next steps:
Building the Wall:
-

- 7. Marshalls bricks are only available in pallets of 90. They are also only delivered with a lorry. I had them delivered to my in-laws due to road access.
-

- 8. I had to move 270 bricks (3 tonnes) of bricks with 25 car trips due to our narow lane
-
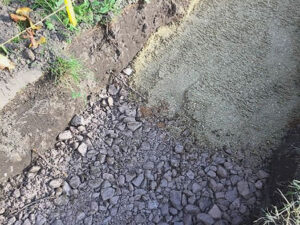
- 9. The base of your trench needs covering with ‘Sub Base mot 2’ and on top of that a layer of sharp sand
-
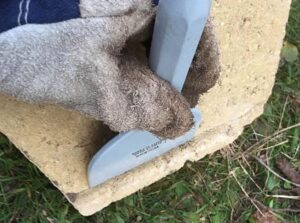
- 10. The first layer of bricks need the bottom lip removing to level them, buy a wide / brick splitter chistel
-
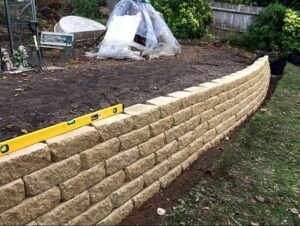
- 11. Take your time, level the first row with a spirit level, check the rows as you go. I built a 180 brick wall in 3 hours
-

- 12. Halving the bricks requires a splitter to hammer around the pre-marked half way line and then some brute force on a concrete path
Back Filling with Shingle:
-
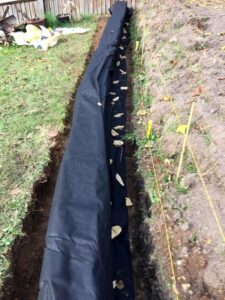
- 13. You need to run some weed suppressant fabric behind your wall to help retain the soil, allowing water through but not the mud. Weigh down the fabric on a long wall to stop it blowing about with pieces of the brick lips your removed for your first layer.
-
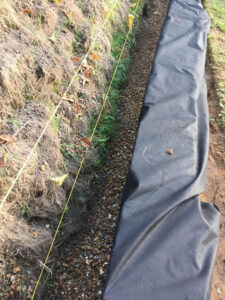
- 14. Next pour in shingle behind your wall for drainage, this is important for the flower bed you put in above it and to prevent the wall from being washed away.
Back Filling Old Turf and Top Soil:
-
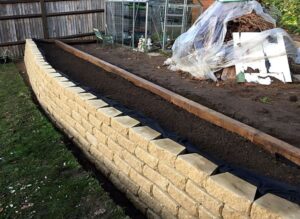
- 15. Now it’s time to lay the old turf pieces upside down again on top of the shingle behind your wall, do this until about 20cms of space remains. Now back fill with top soil from your terracing excavations!
-
- 16. Add compost, potentially a layer of sleepers behind the bed to aid with the retaining as well. I have used sleepers and planted Box hedging in front of it.
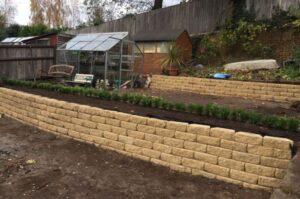
By now you’ve got the idea, and can repeat for your second or third wall. You can see from the photos above and below that I have a single wide wall (9 metres wide) and a smaller wall (5 metres wide) but both are 6 rows high. I left the walls to settle through the winter and have recently begun sieving top soil for level 2 in readiness for turfing. The garden has come a long way since the beginning and is starting to take shape – we will certainly be sitting at the top come April/May, surrounded by Queen of Night tulips and Globe Alliums.
Leave ground to sink, move on to landscaping the terraces.

** September 2017 UPDATE **
We very much enjoyed the terraced garden this year, I will be moving on to a third terrace wall later this month. Here are some photos from the top terraces completed to date:
-

- allium sphaerocephalon (drumsticks)

-

- Mount Everest Alliums
-

- Cypress Tree Lawn
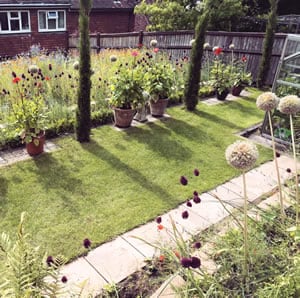

Patio terrace
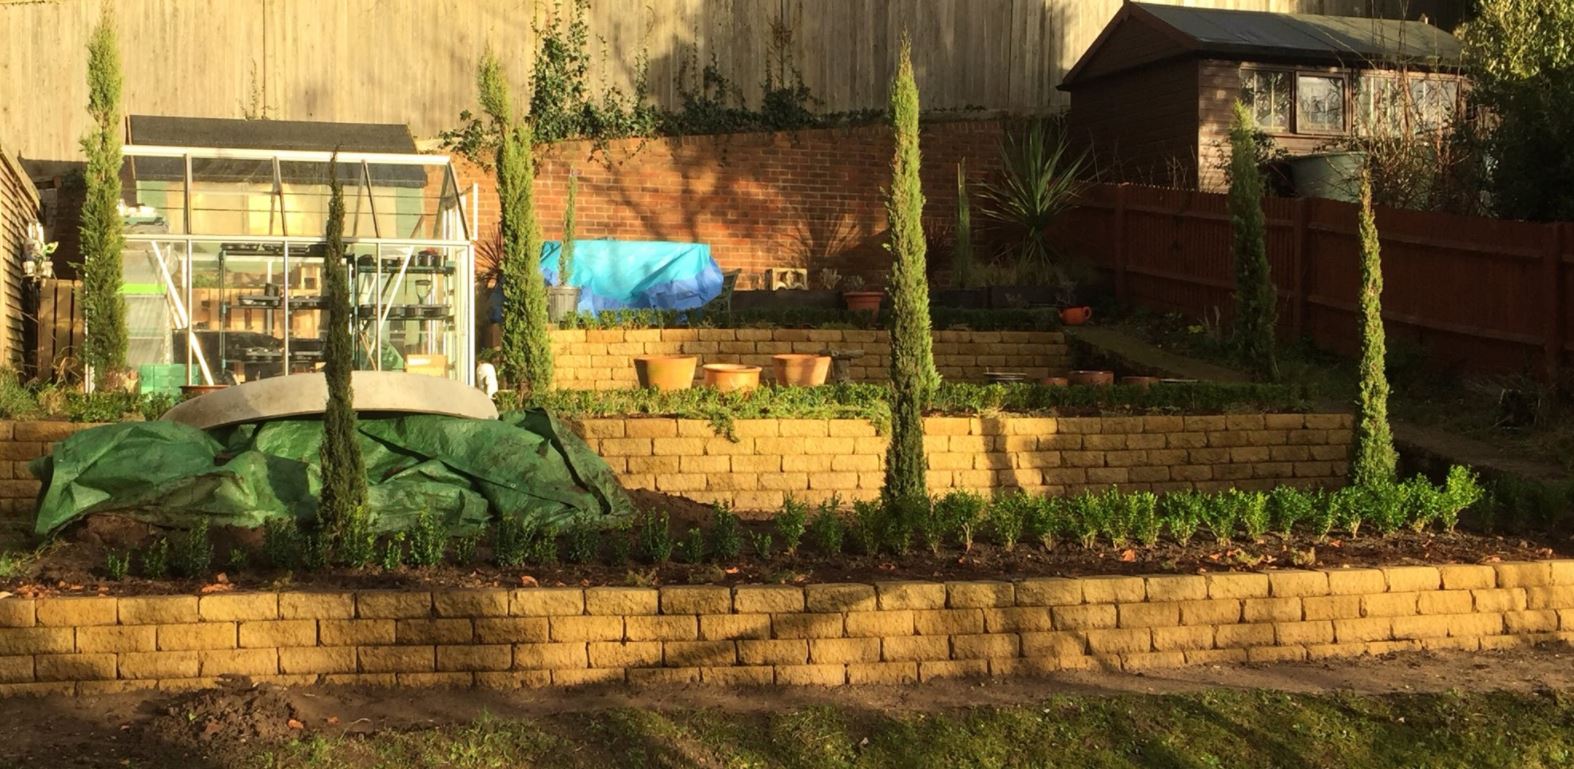
** January 2018 UPDATE **
I decided to build a third terrace wall this year, ordering another 90 croft bricks from Wickes. However I came up a bit short and needed an extra 20 bricks. It turns out that the ONLY place in the country selling Marshalls croft bricks individually is Travis Perkins (£2.88 each). Thankfully they are just as happy to sell direct to consumers as trade and will order them in for you over the phone! Yes they may lose the order confirmation when you get there and even accuse you of making the whole thing up until you present a bank statement showing the debit… but you can pick them up yourself. My estate car just about managed 20 bricks spread across all axels!
Marshall’s Croft Stone Walling


8 Comments
I wanna follow this coz!
I found this most interesting because I want to build a terrace on my rear garden which slopes away from the house in order to lay a patio on it. If I build a terrace which will accommodate a 2m long by 3m wide patio, the walling required at the 2 corners would be about 50cm and 30cm high (slope of garden isn’t level). Croft walling looks to be the cheapest DIY option (other alternatives are Tobermore and Allan Block but they seem v expensive and difficult to source). My only concern is will the croft walling support the surcharge created by the weight of the pavers?
Hi Gareth, I’m no structural engineer so really can’t say for sure but I’ve added a few updated photos for you at the bottom of the post, one is of the top patio I built which is about 4m by 3m. My approach to solving the problem (without really knowing about weights) was to support the marshalls wall with a line of sleepers behind it as well. The sleepers also serve to separate the wall area by making it into a flower bed. So far I’ve not seen any movement, Matt
Hi Matt, many thanks. I love your raised patio, kind of similar to what I want to do. I note you laid sleepers behind the croft stone wall. I’m no engineer either, but guess that the sleepers will act as an extra skin to the wall. Did you fix the sleepers down in any way or just bolt them to each other? I’m pricing out 3 options (area for my walls would come to about 2.4m2): (1) retaining wall from Allan block – it’s not cheap, about £440 inc VAT and delivery for 40 blocks which covers about 3.62m2. (2) Marshalls croft stone walling – £300 inc VAT and delivery for 90 blocks, covers about 2.7m2 (3) Standard dense concrete blocks which would cost about £140 for 70 blocks but the cost of laying a concrete footing and cementing the blocks would be about £240 by my estimates. I probably don’t need reinforcement for the walls given their height but I could use Geogrid if I use Marshalls/Allan block or rebar if I use standard concrete blocks. I’m tempted to go with modular blocks despite higher cost since the facing is way nicer than breeze blocks and it allows another option of curving the wall round to follow the contour of the slope. Cheers
Sorry Gareth just realised that I never replied to your query about my sleepers (which are bolted to each other only). How did you get on in the end with your project? I just added a third wall here (see latest photo at the bottom of this post).
Hi Matt, funnily enough I’ve just started to look into my own project again after not getting round to doing it last Summer. I’m definitely going to do this year though, and over the next 2 months or so, want it done ready for summer.
I like the look of Allan Block but it’s very expensive, Colinwell from N Ireland have been helpful in giving me details but it’s £200 plus VAT just for shipping and the units are almost £7.40 each Inc VAT.
I did email Marshalls to ask about the suitability of Croft units for a retaining wall supporting a terrace with a patio in and they replied that it was not suitable for such use. I guess your walls have been ok though, but I gather you installed railway sleepers behind them so that the Croft wall is more of a facing rather than being the supporting wall itself?
I have found another type called Keystone. These blocks are very heavy, each block is about 34kg. Anderson concrete seem to be the UK suppliers. I’ll let you know if I get any joy with them.
Even though conventional breeze blocks are dirt cheap, I’m still inclined to go with modular blocks due to simplicity, better drainage and no need to lay concrete footings, etc.
Did you ever source a modular system in the UK? it seems very difficult to Source and deliver cost out ways the benefit. not sure why not common place likrethe US and AUS.
Thank you for this post. I was already considering these blocks but stumbling across and reading this page sealed the deal. And I would have just plonked them down but did it properly because of your description. Living on a hill made it a bit of a challenge but once the bottom was there it was a breeze.