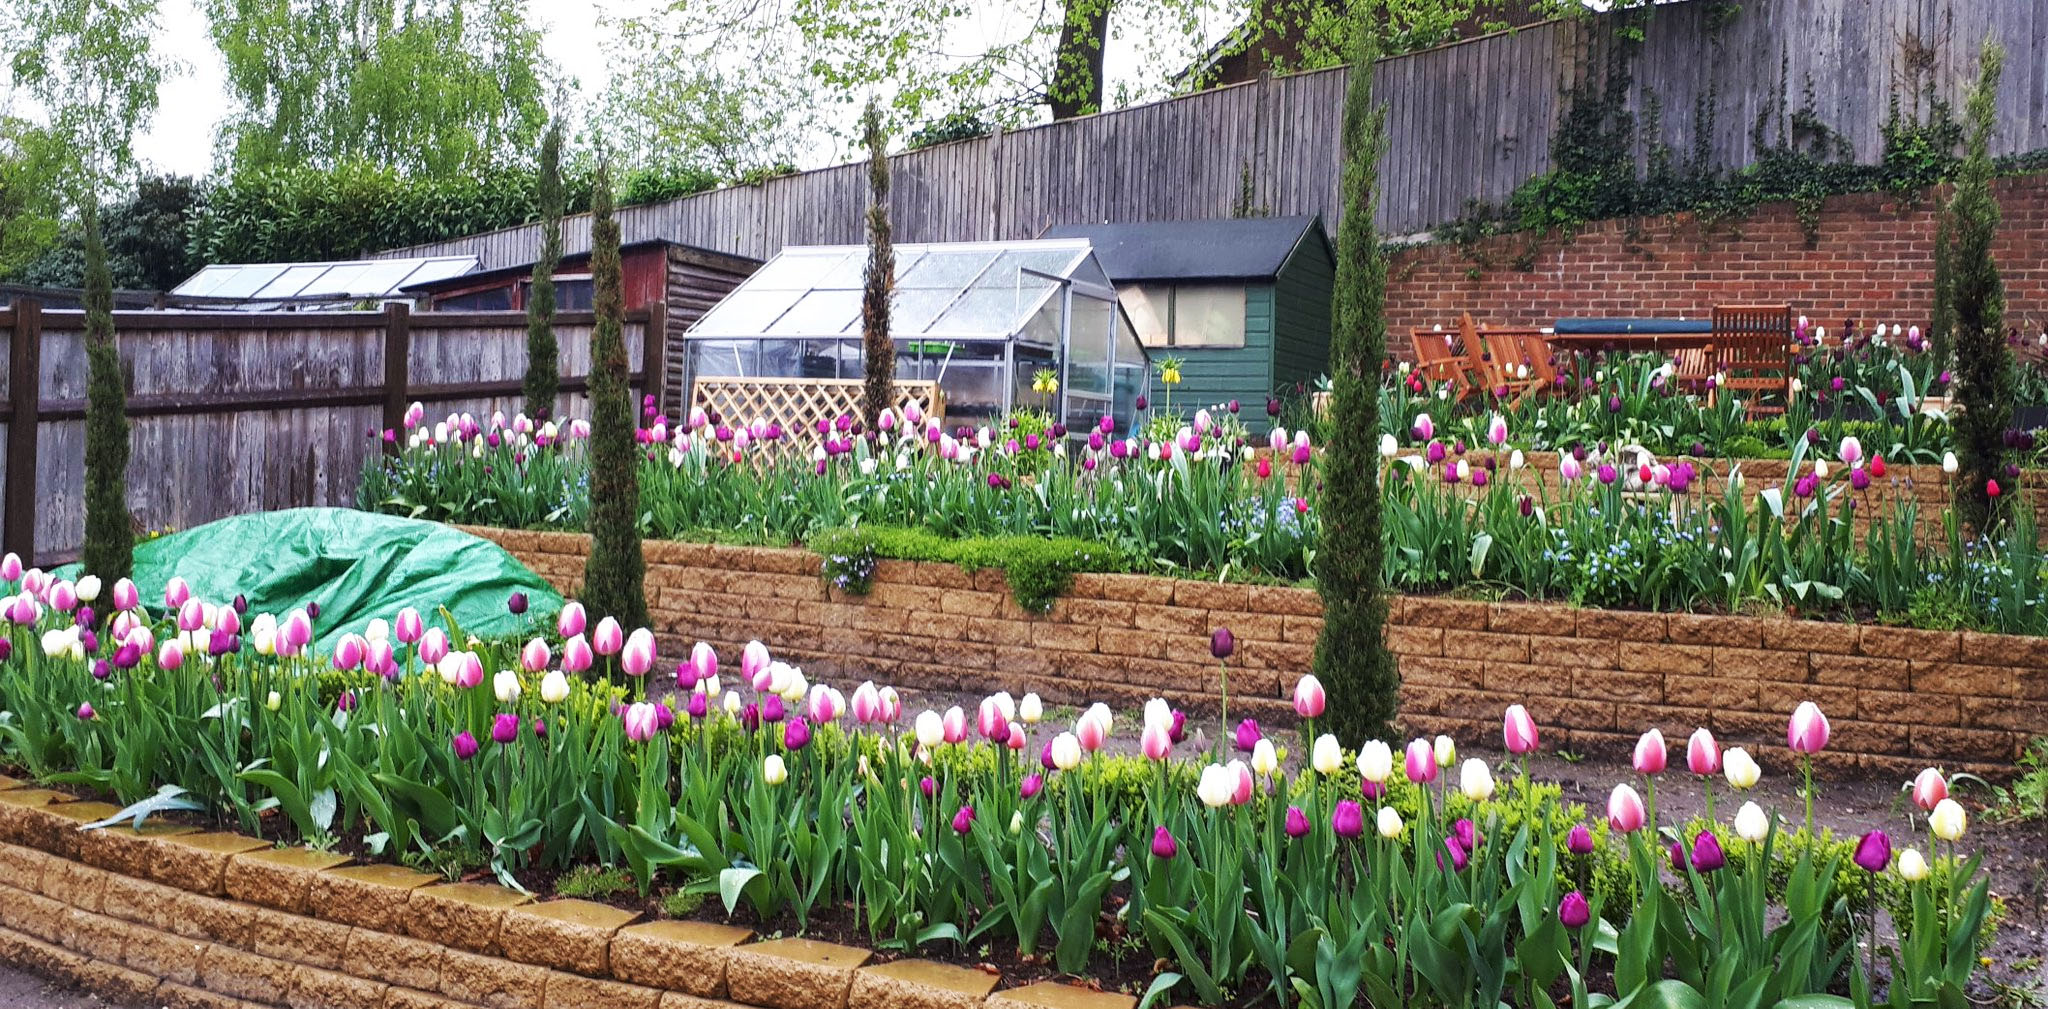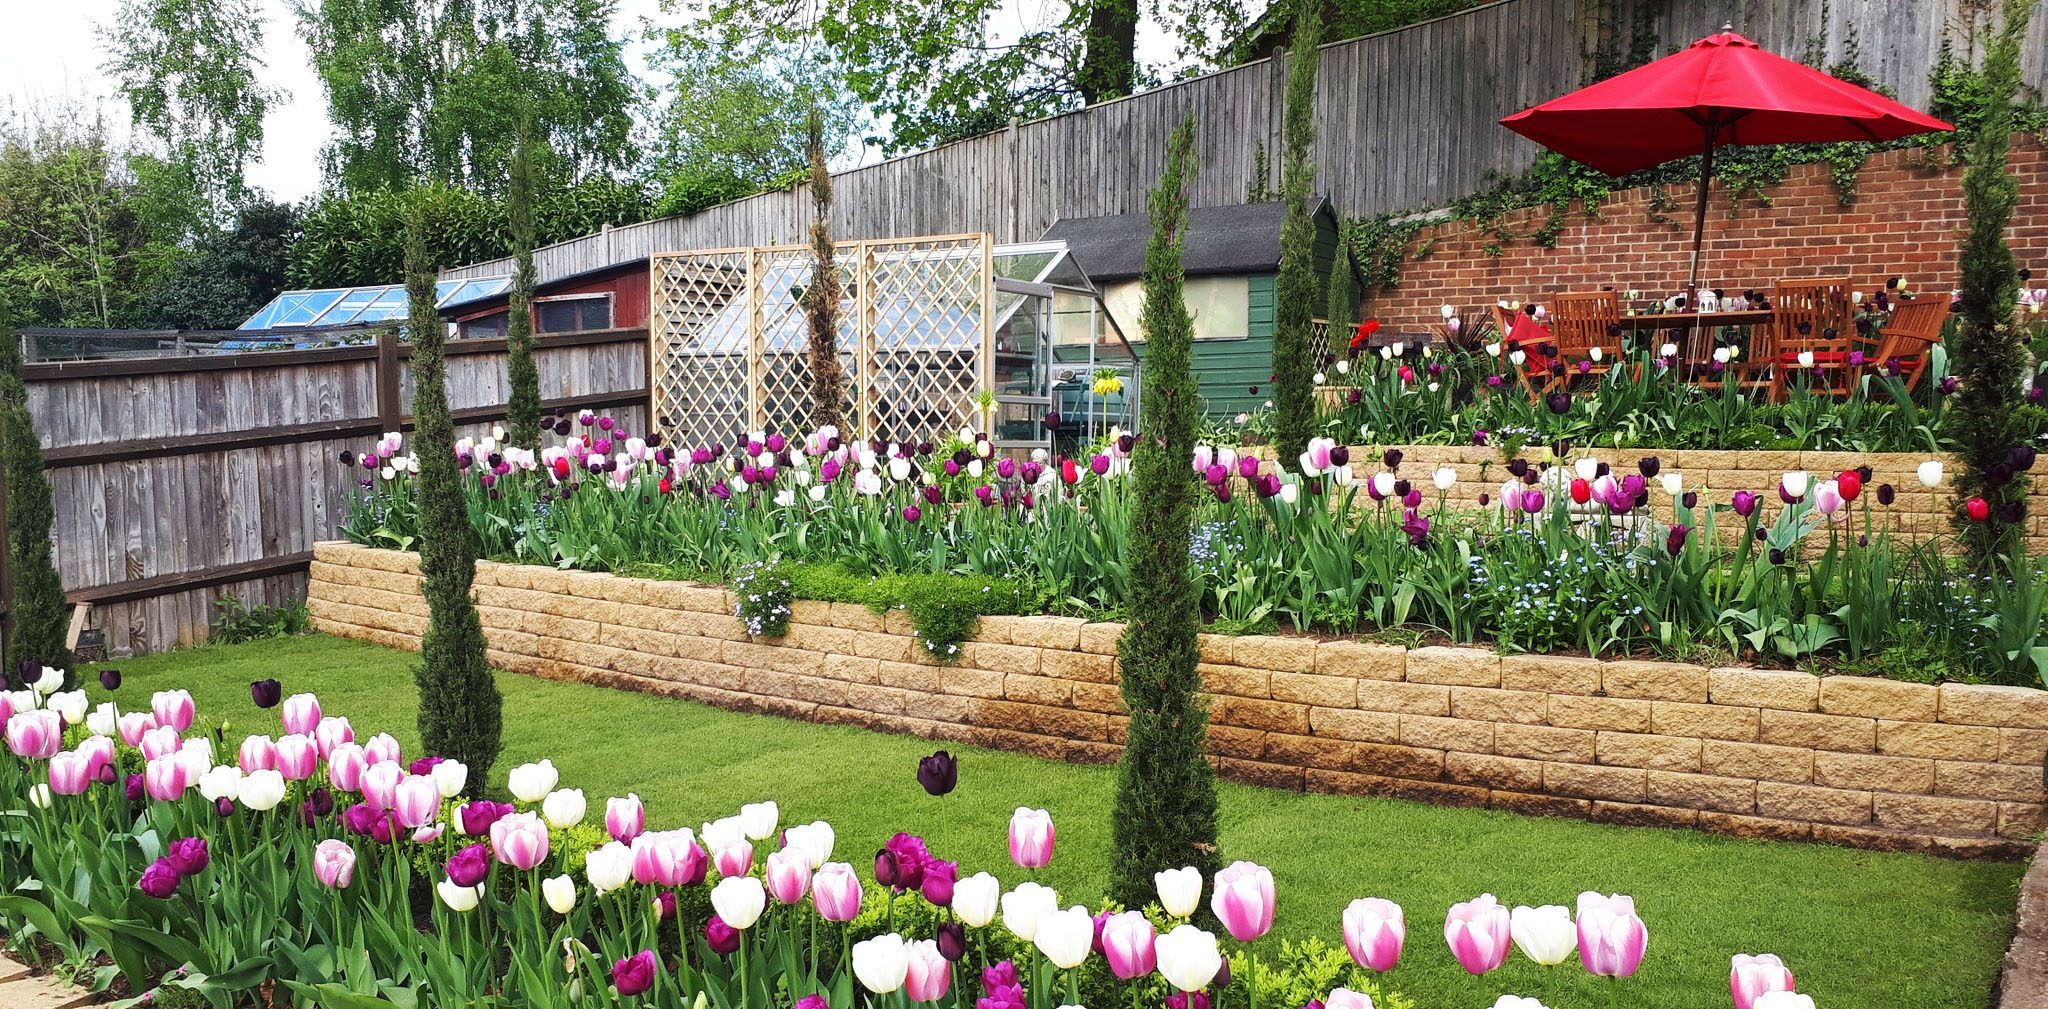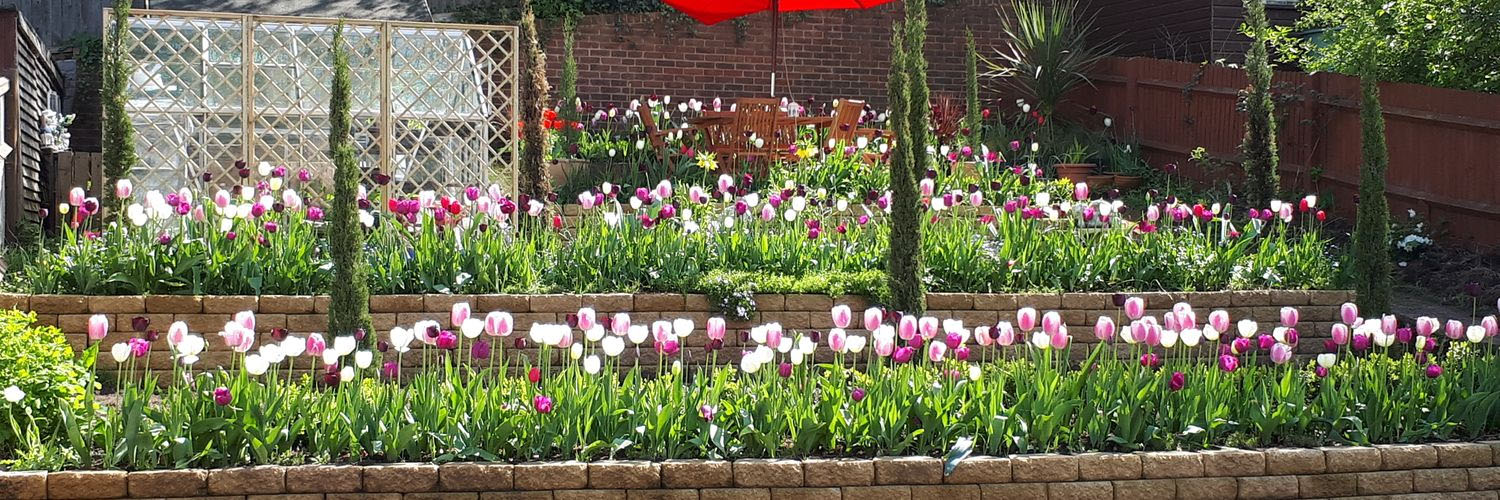


Having a greenhouse is a real blessing for any gardener, moving into a house which already has one in the garden is even more fortuitous. The greenhouse I inherited in my garden is not particularly large, but big enough for me to start most of my allotment crops early. In the summer there’s room enough to grow eight to ten tomato plants, some cucumbers and chillies (white fly permitting). Since we moved in three years ago however, I have noticed that there are two main problems with my greenhouse. Firstly its great hulking silver frame is very unsightly, especially now that I have terraced the weedy hillside and built something beautiful. Secondly our garden is such a sun trap that during high summer temperatures can top 45 Celsius inside even with the door and window open. This is far too much heat for healthy plants to tolerate, last year I had pots stood inside a large plastic pond that I filled each morning, this too whilst practical, looked ridiculous.
Greenhouse screening and shading
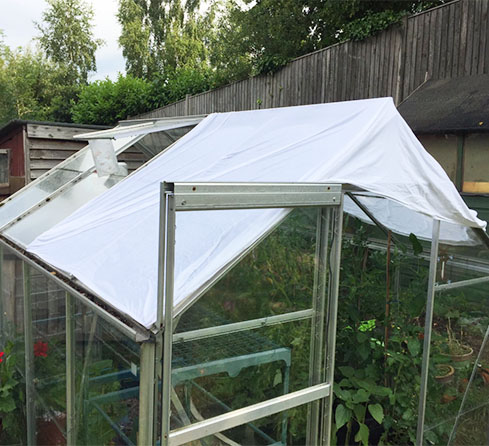
You can certainly provide basic shade to plants growing in a greenhouse with some old net curtains hung up inside on wires, or a bedsheet thrown over the roof and soaked with a hose on a hot day (see right). In recent years I’ve done these things but wanted something more permanent. The most logical solution to my ‘ugly’ and ‘hot as the sun’ greenhouse dilemma was to erect some permanent screening. With the right pattern, garden trellis screening will still allow enough light to pass through to the plants growing within the glass walls of the greenhouse glass, whilst also providing external material to partially obscure the metal frame with a more aesthetically pleasing structure. Trellis also cuts the amount of direct sunlight hitting the greenhouse to reduce temperatures by a few degrees Celsius on ‘leaf scorchingly’ hot days.
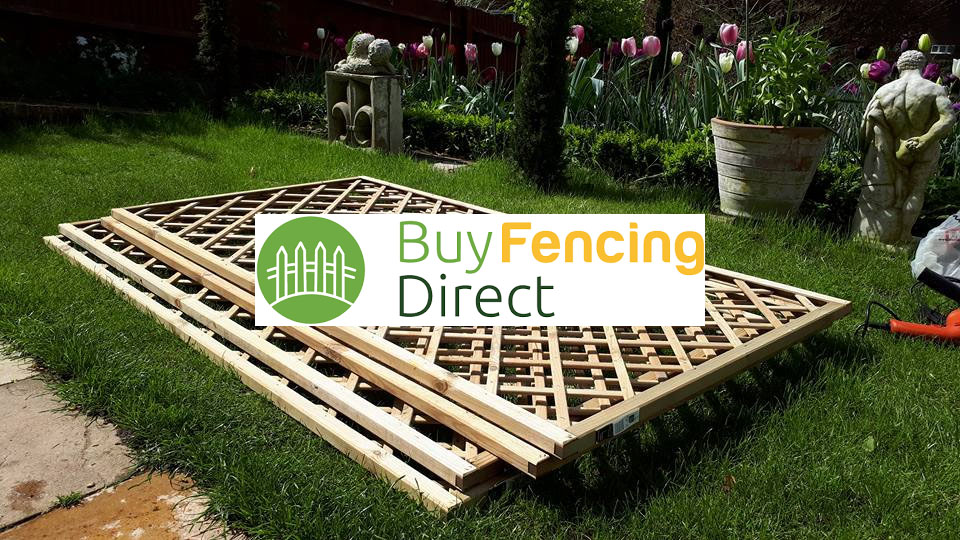
My wooden trellis panels were ordered online at Buy Fencing Direct, specifically I chose a pressure treated trellis panel called ‘Forest Henley Lattice’ which comes in a size of 180cms x 90cms (or 6ft by 3ft in old money). The timber is guaranteed for fifteen years, three of these panels together obscure my greenhouse nicely. Another panel gives some cover to a shed beside my newly constructed patio terrace. I note that at the time of writing this article the panels are reduced to £24.99 from £33.99 – a bargain.
[hr gap=”5″]
Putting up wooden trellis alongside a greenhouse
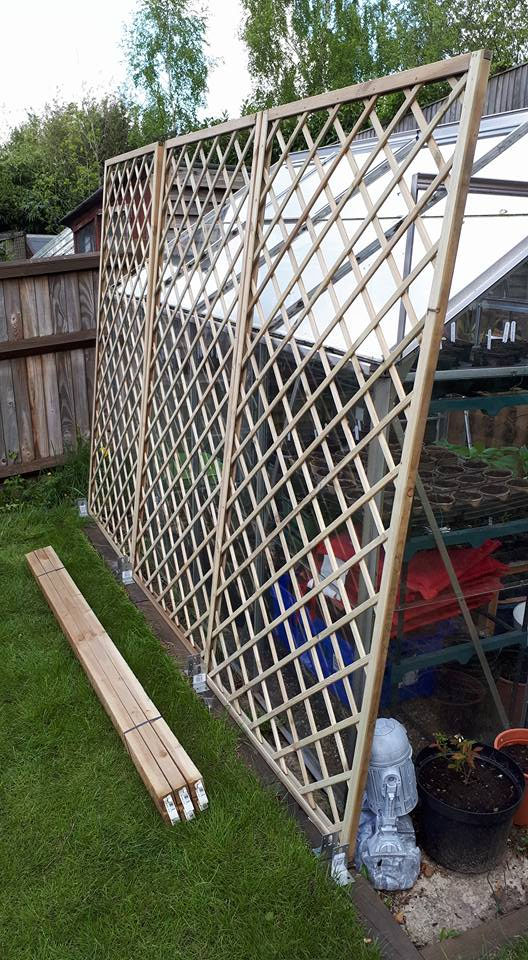
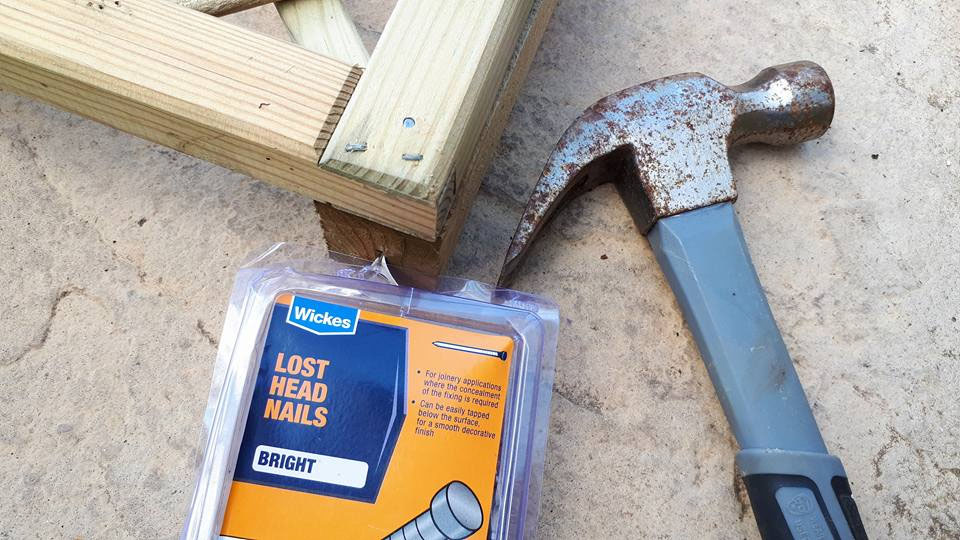
Free standing trellis is not the easiest thing to erect alongside a greenhouse. Unlike a wall or fence there are no drilling options to make easy anchor points. You need to put up some very sturdy 6ft posts – I attached mine to the top of some wooden sleepers that run parallel to my greenhouse base. The trellis posts are double bracketed to the top of the sleepers and the wooden trellis panels are nailed to the posts using ‘lost head nails’. I found that it was easier to fix the panels to the posts with nails whilst they were laying down, prior to putting each one up, rather than potentially putting a hammer or nail through the greenhouse. Before starting it was also a good opportunity to fix a smashed pane of glass that I had fudged with plastic compost bags for two years…
[hr gap=”5″]Preparing the posts for attaching to wooden sleepers:
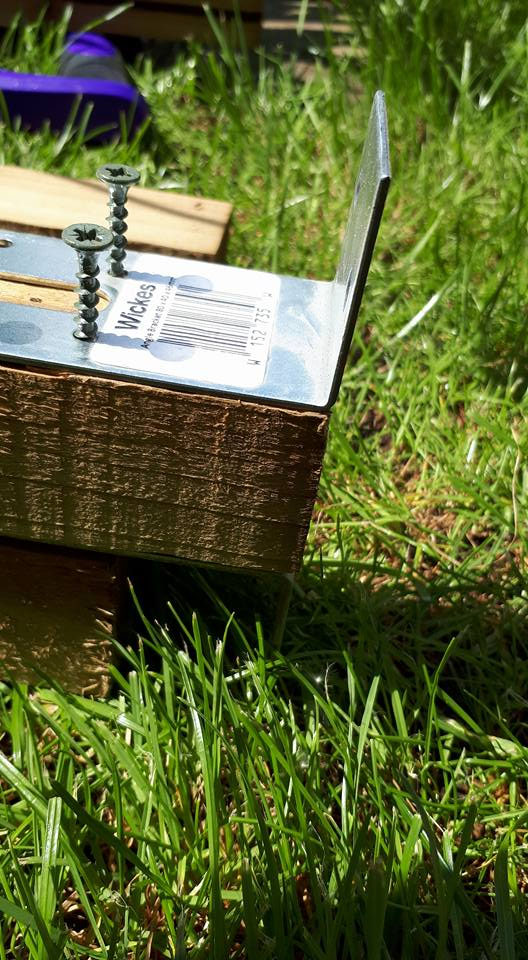
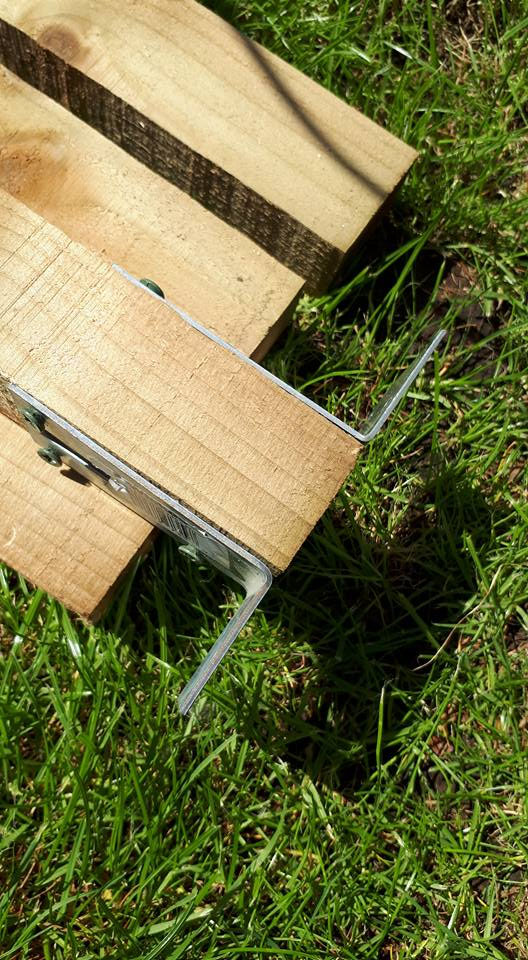
Each trellis panel is nailed to two 6ft posts. Double brackets can be screwed into the posts at the beginning and end of the trellis row but where a post is flush with a neighbouring post panel (as you move along) one bracket suffices on each side. Later you can nail the adjoining posts together anyway with a cleverly placed long nail hammered in at an angle across the very top of the posts:
[hr gap=”5″]
Attaching the panels to the posts – I used ‘lost head nails’
[hr gap=”5″]
Screw down the posts to the sleepers, nail the posts together, plant a Clematis
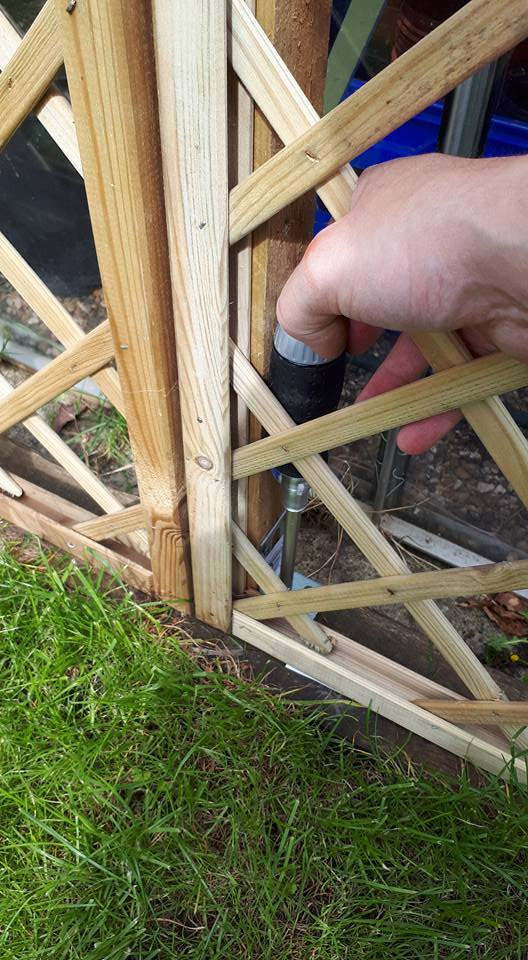
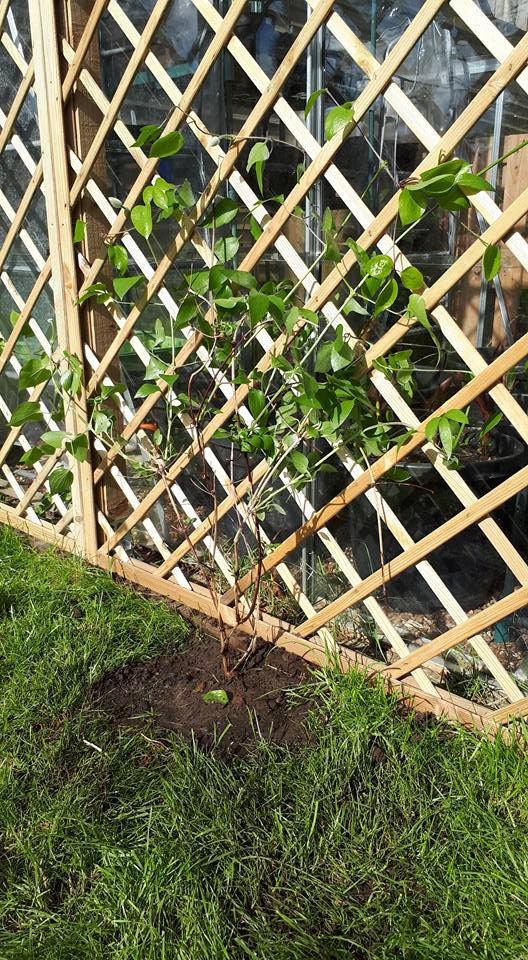
The trickiest aspect of putting up the greenhouse screening trellis was screwing down the brackets to the sleepers without being able to get behind the trellis. I certainly wasn’t about to take the glass out of the greenhouse! Carefully marking and pre-screwing the holes with a drill before removing them again made life much easier. Once the brackets and posts were finally in place I simply used a long screwdriver and patient short twists to secure the panels. I’m not sure how I would have managed with a trellis panel that I couldn’t get my hand through though. Another reason to buy a trellis like ‘Forest Henley Lattice’ with its wider holes, not only does more light get through but it’s easier to erect! When I was finished I moved a Clematis from the front garden (where it really wasn’t thriving) to the centre of the my new trellis screening wall. In a year or two it will cover the trellis with beautiful white flowers.
[hr gap=”5″]
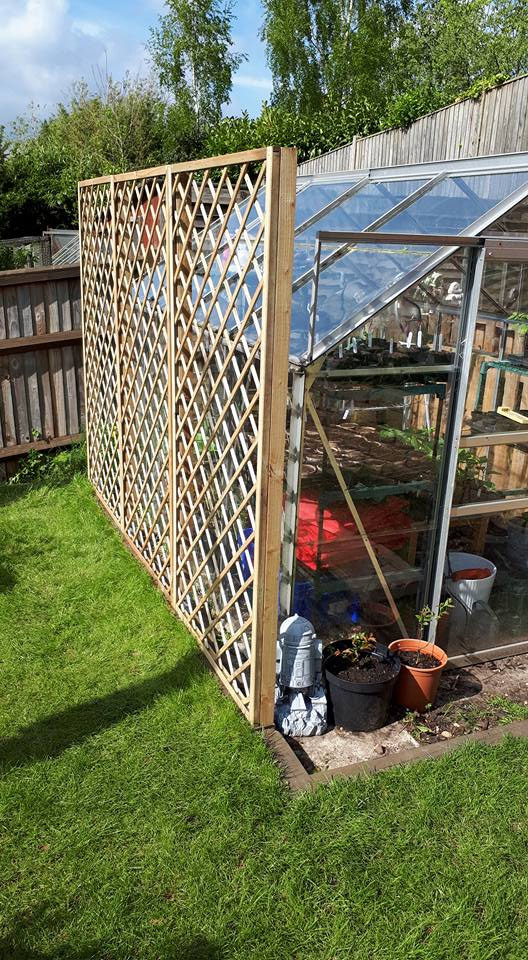
Greenhouse screening success
I am very happy with the view of the garden now that the wooden trellis is up and have already noticed the difference within the greenhouse for the plants inside. They continue to thrive but I don’t have to water them quite so much during very hot spells. I also find it a little more tolerable inside during midday. I look forward to the Clematis climbing all over the trellis and adding more flowers to my summer floral display.